|
Search this site for keywords or topics..... | ||

Custom Search
| ||
Composting 101, Part I
October 10, 2011

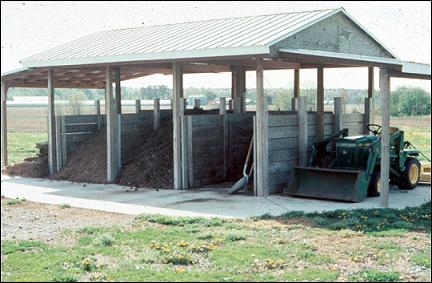
Image courtesy of WSU Extension and the Compost Education and Resources for Western Agriculture project, funded by the USDA SARE program.
Ever start pulling on a small length of string, only to learn that it was connected to the rest of everything? That's what happened to me with this latest blog topic. It was supposed to be a normal little article, but every time I pulled just a little more string, I saw it connected to a few more things. But I digress. Let's get started with this latest topic...
Composting is widely regarded as a good thing to do, and compost is widely regarded as a good product for the farm and garden. It’s manufactured by countless people and companies, at scales ranging from a single bin on the urbanite’s deck or porch, to acres of windrows at commercial facilities. It’s purchased by the bag and by the ton by both farmers and gardeners to boost soil nutrition. There’s 101 designs for farm and garden composting systems, some more elaborate than others. Agricultural extension offices hand out flyers and sometimes equipment to help get folks started with composting, and land grant universities teach workshops and classes on various composting methods. It would seem that composting is one of the few topics everyone can agree on - it’s wonderful stuff, it makes good use of what would otherwise be waste, and there’s steady demand for it.
So, what else is there to know? Plenty, it turns out. Composting is one of the most popular, yet most myth-ridden practices that are in common use for current farms and gardens. I’ve been wanting to take a look at some of those myths, at the facts behind them, and what changes might be made to get the very most out of your own composting practices. Or, if you don’t compost yet, get you started on the road to composting success.
While researching this topic, I found so many different myths about composting that I very quickly had much more than a single blog entry could accommodate. As a result, I’m going to use this first entry as an introduction, then feature ongoing myths and facts about compost ingredients, processing and usage. So, let’s get started with the introduction. Later we’ll cover some of those myths.
“Composting” as the term is used today is a process. Very generally speaking, that process is simply the breakdown of complex organic materials, either plant-based or animal-based, into other substances which collectively improve the soil. That breakdown is accomplished primarily by a wide range of microorganisms, primarily bacteria, but may also include fungi, small insects and invertebrates. That breakdown process can be categorized as either aerobic, or anaerobic. Aerobic bacteria work in the presence of oxygen, but anaerobic bacteria work in the absence of oxygen. While other on-farm processes (such as silage-making or bio-digesters) involve anaerobic bacterial processing, virtually all soil fertility-boosting composts are made aerobically.
Composting can be used to break down and recycle a wide range of materials, including animal manures, animal carcasses, weeds, some types of diseased plants, small branches and vine trimmings, and post-harvest materials such as stems, seeds, pith, roots, whole potted plants, skins, bones, hooves, and internal organs. On a smaller scale, composting is very successfully used for household paper, kitchen and yard waste. This wide variety of input materials can have a very pronounced impact on the composting process itself, along with the resulting product.
Regardless of the starting ingredients, aerobic composting is generally measured with only a few different variables. First and foremost is the ratio of carbon to nitrogen. That ratio can only vary by a small amount, and even variations within that range will result in different attributes for the finished material. The ideal generally listed for compost is a ratio of 30:1 C:N, which means 30 parts carbon to 1 part nitrogen. Sometimes that is expressed in weight, other times in volume. Unfortunately, most of us don’t have the ability to instantly determine what C:N ratio any given material has. Thankfully, there are some rules of thumb we can follow. Carbonaceous materials include most woody materials, paper materials, rags and fabrics. Nitrogenous materials include manures, urine, blood, any animal materials, and fresh green materials such as grass clippings. There are a number of published lists available, showing the C:N ratio for a wide variety of common ingredients. They are listed in the Resources section at the end of this blog.
A second critical variable is particle size. The smaller the particle size, the faster the material can be acted upon by the composting microbes. The larger the particle size, the more time it will take to break that particle down to smaller sizes and then act on the substances within. Many practiced composters will sift out near-term compost to remove the larger chunks. The finer materials are finished and ready for use, while the larger chunks are simply added into the next batch of compost.
The third criteria to consider is moisture. As with C:N ratio, the exact moisture can be inconvenient to measure directly but some educated guesses can be made. The ideal overall moisture content for the composting pile is 40% to 60%. That is approximately the moisture of a wrung-out sponge. You can feel the moisture, but it’s not dripping. If the pile is drier than that, the aerobic microorganisms won’t have enough moisture to do their work. Conversely, if the pile is wetter than that, the moisture can drive air out of the pile, thus turning it anaerobic. Conveniently, moisture is relatively simple to adjust. If the compost pile’s main starting ingredient is wetter than desired, the compost manager can add dry materials to even out the moisture content. If the main ingredient is too dry, the pile can be watered either as the new materials are added, and/or throughout the composting process.
Given that so many materials can be used in compost piles, and that each has a different C:N ratio, size and moisture content, how does a wannabe composter put together a workable compost pile? Here again, there are a number of recipes and approaches available. One popular approach is to layer carbon-rich materials with nitrogen-rich materials. Each layer would be at most a few inches thick. This approach works well if small amounts of material are being added at any given time. The carbonaceous materials are generally added first and last, sandwiching the nitrogenous materials inside. Another approach is to mix the starting materials in a bucket or cement-mixer, then adding the mix to the pile for a uniform, correct-ratio starting pile. A third approach, particularly for larger operations, is simply to put the new materials into an existing pile, then turn the pile or bury the new materials right away. This level of compost-making is often done with a front-end loader or other heavy equipment, but the same principle applies on a smaller scale with large volumes of new material. More detailed recipes are provided in the Resources section at the end of this blog.
These piles are stored in a very wide variety of shapes and containers. Home-scale composting containers might simply be a few small bins. Small scale farm composting might be a few 10x10 piles, contained by cement blocks or other infrastructure. Here again is another rule of thumb to remember. Composting needs a certain critical mass to create and sustain a suitable temperature for aerobic digestion. That critical mass can be provided via a cube shaped container of roughly a meter or yard’s length on each side. So for instance, a cube measuring 1m long by 1m wide by 1m deep would be the minimum volume needed to allow for the composting process. Larger piles can work quite well, but still must be sized to be appropriate for the volume of incoming material, and the volume of outgoing compost. The compost piles must also reflect how the compost manager will work with the pile. If that means using hand tools such as shovels and rakes, then 1-2 meters on each side is generally big enough. If the compost manager has access to power equipment such as a front end loader, the piles can be bigger and deeper. Another good rule of thumb is to consider how to set up the composting area for maximum efficiency. Generally speaking, most compost masters recommend having three piles - one being built, one digesting and one which is finished and ready for use. Whatever the arrangement, covering the compost piles is definitely in order, to keep rain and snow off the pile.
The time needed for any given composting process doesn’t vary much. Under ideal conditions of 30:1 C:N ratio and 40% to 60% moisture, the compost pile will begin heating right away, and reach near maximum temperatures within 5-10 days. That high temperature, typically around 160F, will then last for approximately 20 days, at which time the pile will cool off and stay cool from that point forward. When the overall nitrogen content is relatively high, composting temperatures go higher, but don’t last as long. When overall nitrogen content is relatively low, composting temperatures do not reach such high temperatures, and like the relatively high nitrogen pile, the temperatures do not last as long. It should be noted that most weed seeds and disease organisms are killed at those higher, longer-duration temperatures. That is one of the major reasons to strive for an ideal C:N ratio. Organic certification rules reflect that, with a stipulation that compost piles must be at 150F for at least 15 days before application on the fields or growing areas.
This is very definitely only the tip of the iceberg for composting knowledge. There is much more to come, I promise. If you’ve read this far and want to read more, here are a range of reading materials for you to peruse. In the meantime, I will continue writing up additional composting entries to be added to the blog in the coming weeks. We hope you find something here of value for your own home, garden or farm.
Additional Compost Reading and Resources:
Composting 101's guide to the C:N ratio
WSU/Whatcom County Extension office Compost Fundamentals Series
City of Davis, California's Guide to Backyard Composting series
Our Successful Farming and Ranching Books

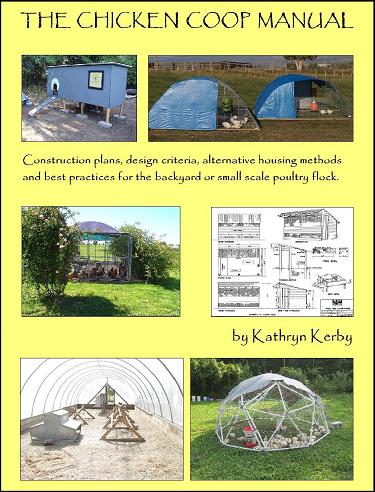
We released our very first self-published book. The Chicken Coop Manual in 2014. It is a full color guide to conventional and alternative poultry housing options, including 8 conventional stud construction plans, 12 alternative housing methods, and almost 20 different design features. This book is available on Amazon.com and as a PDF download. Please visit The Chicken Coop Manual page for more information.

Rabbit Colonies: Lessons Learned
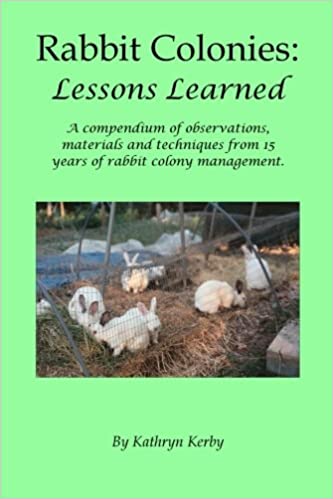
We started with rabbits in 2002, and we've been experimenting with colony management ever since. Fast forward to 2017, when I decided to write another book, this time about colony management. The book is chock-full of practical information, and is available from both Amazon and as a PDF download. Please visit the Rabbit Colonies page for more information.
The Pastured Pig Handbook
We are currently working on our next self-published book: The Pastured Pig Handbook. This particular book addresses a profitable, popular and successful hog management approach which sadly is not yet well documented. Our handbook, will cover all the various issues involved with pastured hog management, including case studies of numerous current pastured pig operations. If you have any questions about this book, please Contact Us.